Friday 29 January 2016

Ginger and Coriander Tea


For half of this past week, I was stressing about a presentation for my final production project.  I've always been nervous about presentations, but whereas previous presentations that I've done at university have been for projects that I have done during that past semester and a demonstration of what's in the website and how it works, this presentation was a pitch to a class of about 21 for a website that I was proposing to make as part of a group for our final projects.  In the past couple of weeks, I've also been worrying quite a lot that my web design skills are not sufficient and that I'm not getting enough good grades.  The former may be helped via a series of tutorials on YouTube that one of my coursemates has now suggested, and the latter has now been helped by an unexpected good grade on a project I'd thought I'd done really badly in.  During the presentation itself, I was very nervous and my prepared speech did not line up very well with the detailed Powerpoint presentation I'd produced, but one of the others said that I'd had plenty of information in the presentation.  To recover afterwards, I went to Elina's for lunch (some very nice tomato pasta) and curled up for a bit.  On Thursday, I was then placed into a group to create a website called Brass Band Live, which will be a hub of resources, news, interviews, reviews, etc. for brass bands around the country.  My homework for the weekend is to learn how to use the Bootstrap framework, watch lots of tutorials on YouTube, and make a draft visual design template for the front-end of the website.

At BUSOM this week, I continued to try to sort out costumes on Tuesday and extracted a few items from the society's costume boxes, including two Muse skirts used in Little Shop of Horrors (main show, March 2014) and a pair of sunglasses with sideburns used in The Rocky Horror Show (24 hour show, October 2014), and acted as a stand-in on Thursday during the acting rehearsal.  The scene where I cameo as a "Minion" (no, not the annoying yellow thing), who acts as a computer mouse/cursor and moves characters around the stage during a dream sequence, was in the scenes rehearsed last night, but I'll only be learning my choreography for this when another song is learned.

At Archery yesterday, I learned from Owen that because I'm using a lower poundage bow (18lb 66in), I need to aim higher when shooting.  Normally, a lot of my arrows end up going under the target and onto the floor, but after this tip, a lot more of them hit the target yesterday, and I even scored a 3, 5 and 8 in one end!  However, I also need to learn to bend my arm more and move my armguard higher up my arm because the bowstring slapped my arm a couple of times and I now have a couple of bruises on my left arm.

Tomorrow, I'm going to Anna's birthday party which is a tea and craft party at another friend's house (the friend whose birthday it is has already graduated and lives in another town).  We've been told to bring a cup, a teapot if we can (so we can have several different teas going around the group), a type of tea, and a craft to do.  If there's the space available in the kitchen, I'm thinking of making this super-simple tea recipe that I found in Hidden Kitchens of Sri Lanka by Australia-based Bree Hutchins, a freelance travel and food photographer who travelled around Sri Lanka for 2 months in 2013 and took up residence in many Sri Lankan locals' kitchens to learn recipes from them and about their individual cultures and traditions.  Later this year, I'll be discussing Sri Lanka more and finding more curry recipes, but this is the only one for now.  This tea is said to have health benefits, including as treatment for colds.

Ingredients (serves 4)

50g (1.75 oz/heaped 1/2 cup) coriander seeds, washed
40g (1.5 oz) piece ginger, roughly sliced
sugar, to taste

Instructions

  1. Mix together the coriander seeds and ginger in a saucepan with 1 litre (35 fl oz/4 cups) water.
  2. Bring to the boil, then reduce the heat to medium and simmer, uncovered, for 15 minutes.
  3. Strain and add sugar to taste, stir well and serve.

Friday 22 January 2016

Vegan Affogato


A long, long time ago (okay, only about 16 months ago, and I'm totally singing Don McLean's American Pie in my head while writing this), before I started mainly posting vegan-friendly recipes in an effort to build myself an arsenal of recipes for when I eventually go vegan (unfortunately, this hasn't happened yet, but I'm definitely consuming less animal products than I used to), I posted a recipe for affogato that used an ice cream recipe that contained both dairy and eggs from Coffee and Bites by Susie Theodorou.  Last weekend, I ended up helping out at a demonstration stall that Gaggia Milano were hosting in the Trinity Shopping Centre in Leeds to promote their coffee machines and ice cream machine, and helping to make and taste-test some (also unfortunately non-vegan) ice cream last weekend at work to make affogato, so following that I'm now going to redo this recipe using a vegan-friendly ice cream recipe which uses coconut milk instead of dairy and was found at GI 365, but still using the instructions for making an espresso provided by Gaggia. 

Ingredients

2 cans (430ml or 13.66oz each) coconut milk, refrigerated
1 cup high quality maple syrup - add a little at a time to your taste
For espresso (using fresh ground coffee, but if you don't have a coffee machine, you can find alternative ways of making the espresso for this):
  • single espresso: 7-8g
  • double espresso: 14-16g

Instructions (Espresso)

  1. Spoon coffee into the appropriate filter (single or double).
  2. Tap the handle to evenly distribute the coffee.
  3. Tamp (firmly press down the coffee) to compress the grounds, and brush off any grinds from the edges of the filter handle.
  4. Insert handle (hold up to the "group" at an 8 o' clock position and tighten to a 6 o' clock position.  Ensure the handle is securely in position before starting).
  5. Start flow of water immediately.
  6. Stop when 30ml is reached for a single espresso or 60ml for a double espresso.

Instructions (Ice Cream)

  1. Blend the coconut milk and maple syrup until thoroughly combined.  You can whisk it by hand or blend it in a blender.  If your coconut milk isn't chilled, chill the ice cream mixture until thoroughly cold before freezing.
  2. Freeze according to the instructions of your ice cream machine - this should take about 30 minutes.
  3. Serve a single scoop of ice cream into an espresso cup.
  4. Pour the espresso over the ice cream and serve immediately.


Friday 15 January 2016

Simple Tomato and Mushroom Pasta


This is now the first food post of 2016, following Wednesday's post on This Is Not A Book.  I'm going to start the year with a main course that I found on plant-based, dairy-free and gluten-free food blogger Deliciously Ella's website.  I've chosen to look at a Deliciously Ella recipe because I noticed that she has a book signing event in Leeds in just under two weeks at a Waterstones store which I think is near the Trinity Centre, so I might ask my dad to take me to Leeds with him on that day (I don't have lectures on Wednesdays and we won't have had groups assigned for our final project yet).  I'm a big pasta person, so this recipe for tomato and mushroom pasta sounds perfect.

Ingredients (serves 4)

300g of pasta (four 75g servings) - brown rice pasta is suggested
1 packet of cherry tomatoes (about 250g)
1.5 packets of chestnut mushrooms (350-400g)
1/2 a packet of spinach (about 100g)
5 cloves of garlic
3 heaped teaspoons of tomato puree
2 teaspoons of brown miso paste
1 teaspoon of chilli flakes
1 teaspoon of paprika
salt and pepper
1/2 a lemon (optional)

Instructions

  1. Chop the tomatoes into quarters and the mushrooms into slices.  Put the pasta on to cook.
  2. Peel the garlic and crush it into a pan with a glug of olive oil, salt and pepper. Let this heat for a few minutes until it’s bubbling.
  3. Add in the tomatoes, mushrooms, chilli and paprika and let this cook for about five minutes, until it’s all soft.
  4. At this point stir in the spinach, tomato puree and miso and let the spinach wilt.
  5. Once the pasta has cooked and been drained, then stir the sauce into the pasta
  6. Squeeze the lemon on top, if you’re using it, and add a little salt and lots of black pepper to finish.

Wednesday 13 January 2016

This Is Not A Book - 2. This Is A Secret Agent


I think I'd originally promised to be back last Friday (8th January 2016), but I've been a bit busy with uni assignments over the past few days.  However, those are now finished and for the next few days, I can generate as much blog material as I want (I'll also be catching up with studio manager things at RamAir, and attending a production meeting for BUSOM's March production of Back to the 80s).

I also have a lot of things happening in 2016:

  1. This is my final semester of uni and overall education, so from next week until mid-May, everything is going to become a huge whirlwind.  I have to get an idea pitch ready in the next fortnight, and then we'll be split into groups for our big final project.
  2. From 12th to 14th March, I'll be producing the aforementioned Back to the 80s production at Studio @ at the Bradford Playhouse.  The production team and I are all very nervous and excited.  I'm mainly doing behind the scenes things like props, costumes, etc., but I've also been thinking about some choreography for Material Girl which I can't wait to test with the others if it works.
  3. In early June, I'll be turning 21.  I currently don't have anything planned, it's also while my brother has school, and it's while many of my uni friends will have possibly gone home for the summer/before graduation and my school friends won't be back home yet, but I'd love to go to London with some of my friends and check off some items from World of Wanderlust's London Bucket List!
  4. In mid-July, I'll (hopefully) be graduating from the University of Bradford with a BSc in Web Design and Technology.  I don't know what the plan is from here though.
  5. Something else that I am kinda excited about, but I'll keep under wraps for a bit until I know properly what's going on.

Anyway, flashback to a month ago, and I was doing Christmas stuff at uni and had had the BUSOM Secret Santa, in which I received This Is Not A Book by Keri Smith.  I said in my first post about this book (12th December 2015) that I didn't know who had given me this for Secret Santa, but I now think it might be Hannah (because of reasons involving wrapping paper), so THANK YOU SO MUCH!  I really want to get into this book more this year and blog my experiences with it on this blog, so here's the second instalment:

"This is a secret agent.

Instructions: Give This Is Not A Book some kind of disguise to hide its identity."

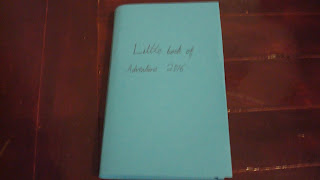
So this sounds mostly simple, right?  By the way, I'm not going to stick anything onto the book, so the following "disguise" is just temporary and also a lot like a dust cover ...

The book without any disguise ...
 
I feel disappointed in myself for not doing anything more elaborate, but this is a little bit awesome anyway.  I'm not very good at folding at all, so the folds to slip the book covers aren't straight or even at all.  I had to try several times to get it right.  Here it is anyway - a simple blue card cover with the title "Little book of Adventure 2016" because I think and hope that this book will bring me many adventures over this year (and possibly beyond) without having to go to places far away (although I will possibly be doing that as well).  Maybe I should have put a picture of a previous adventure under the title ... oh well.  Maybe another time.

Little book of Adventure 2016!
 
 
Before I sign off, I'd just like to say I was distraught to hear on Monday morning as I turned on the television to watch the news during breakfast about David Bowie's death.  In fact, it felt like I was being kicked in the stomach and I kept wishing it wasn't true.  I was so confused because he'd released a new album on his 69th birthday, just 2 days before his death, even though he'd been ill.  Even as a 20 year old, many of my friends and I were influenced by David Bowie and yesterday I felt quite lost, especially when listening to his older music and finishing my report.  I've been listening to his music since I was 14 and at an awkward stage of my life where I was quickly changing (not physically, but emotionally) and didn't know what to do.  Last night, just as I was about to go to sleep, I looked out of my bedroom window to see if there were any stars in the sky that were any twinklier than the rest.  Most of the stars were very faint, but I think there was one that was just a little bit brighter, and I thought that maybe that was the Starman, waiting in the sky.  Rest in peace, David Bowie (1947-2016).


Sunday 3 January 2016

Katie's Christmas 2015 - Sock Snowman DIY


A few weeks ago, my university's student union held a "crafternoon" for 3 hours to raise money for the mental health charity, Mind.  Entry was £2, but then we had access to plenty of craft materials, including cards, foam shapes, felt shapes, pipe cleaners, beads, buttons, different coloured craft lolly sticks and scrap material.  When I arrived (just over an hour in because I'd been studio-managing at RamAir, several people were making sock snowmen.  While making my own, I unfortunately managed to spill a little bit of rice on the carpet floor (because I'm a messy child) and even more on the table (which I could gather up and pour into the sock from there), but with a tiny bit of help with tying the ribbon, I managed to finish it.  I also gathered some of the materials to make another one at home, so this is the story of how I made the second sock snowman (photos to come)!

What You Need

an ankle-length white sock (preferably a large size)
a red and white baby's Christmas sock
dry rice or polyester stuffing
thin ribbon
felt tip/Sharpie/fabric pens
PVA or craft glue.
buttons

Instructions

  1. Fill the white sock to about 2/3rds capacity with rice or polyester stuffing.  If using rice, try using a spoon and a funnel (either a real funnel or a paper one) to make sure as much rice as possible goes into the sock.
  2. Separate a section of the filling off to be the head of the snowman and use a piece of thin ribbon to tie this area off.
  3. Use another piece of thin ribbon to tie up the top of the head of the snowman to prevent the rice/stuffing from escaping.
  4. Roll up the top of the baby's sock slightly and use it to cover the top of the head of the snowman.
  5. Use PVA or craft glue to glue buttons for the snowman's eyes and "coat" buttons.
  6. Draw on the snowman's nose, mouth and arms with pens.